Atlanta Irrigation Controller Troubleshooting Guide
An irrigation zone that stays dry can waste grass, plants, and time, especially during a hot Metro Atlanta summer. The problem may be a programming error, a failed wire, a stuck valve, or a clogged sprinkler head.
Good irrigation controller troubleshooting starts by identifying whether one zone has failed or the entire system has stopped. Then you can test the controller, wiring, valve, and water flow in the right order.
Start by Defining What Failed
Before changing settings or opening a valve box, run a quick system check. Write down the zone number, what the sprinklers do, and whether other zones operate normally. This simple comparison often cuts the search in half.
When one zone won't run
A single dead zone usually points to a local issue. Common causes include:
- A damaged zone wire between the controller and valve
- A failed solenoid
- A loose wire at the controller
- A valve that won't open
- A programming error for that station
- A broken or clogged sprinkler component
If the controller activates every other station, the transformer and main power supply are probably working. Focus on the affected station and its valve.
When every zone won't run
A complete system failure points to a problem upstream. Check the controller display, outlet, circuit breaker, GFCI outlet, transformer, rain sensor, and irrigation shutoff.
Also check whether the controller is set to Off, Rain Delay, or Seasonal Shutdown. A blank display often means the controller has lost power, although some units can retain programming while the display remains inactive.
Irrigation Controller Troubleshooting Starts With the Display
The controller may be working correctly while the schedule prevents a zone from running. Check the display and programming before digging in the yard.
Confirm the station settings
Review the date, time, start times, watering days, and station run time. A zone can appear broken when its run time has been set to zero or assigned to the wrong program.
Check the following settings:
- The controller has the correct current time and day.
- The affected station has a run time greater than zero.
- The selected program runs on the current day.
- A seasonal adjustment has not reduced the run time to zero.
- A rain delay or water budget setting isn't blocking operation.
- The station isn't scheduled after a second program that never starts.
If the controller has multiple programs, inspect each one. A zone may run under Program B even though you only checked Program A.
Check power and sensor controls
Inspect the power connection, breaker, and GFCI outlet. Some outdoor controllers have a fuse, so check the fuse if your model includes one. Replace it only with the correct type and rating.
Rain sensors can interrupt all zones or selected zones. Use the controller's sensor bypass setting for a short test, then return it to the normal position. If the system runs only with the sensor bypassed, inspect the sensor, mounting position, and wire connections.
Don't open a high-voltage compartment unless you have the training to work safely around it. A licensed electrician should handle problems inside the power supply section.
Use a Manual Run to Separate Settings From Hardware
Start the affected station with the controller's manual run feature. Run it for two or three minutes while standing near the sprinkler zone. Listen for the valve to open and watch the heads for water.
The result tells you where to look next:
- If the zone runs manually, the valve and field wiring may be fine. Recheck the automatic schedule.
- If the controller counts down but no water appears, test the valve, solenoid, and supply line.
- If the controller displays a short, fuse warning, or resets when the station starts, suspect wiring or a solenoid.
- If the controller skips the station entirely, review programming, sensor settings, and station assignment.
A zone that runs manually but not automatically usually has a scheduling problem, not a buried pipe failure.
If manual operation works, inspect the start time and watering days before replacing any equipment. If manual operation fails, continue with electrical and valve testing.
Trace the Fault Through the Wiring and Valve
Low-voltage irrigation wiring can fail after landscaping, edging, animal damage, weather exposure, or careless digging. The controller may look normal even when the signal never reaches the valve.
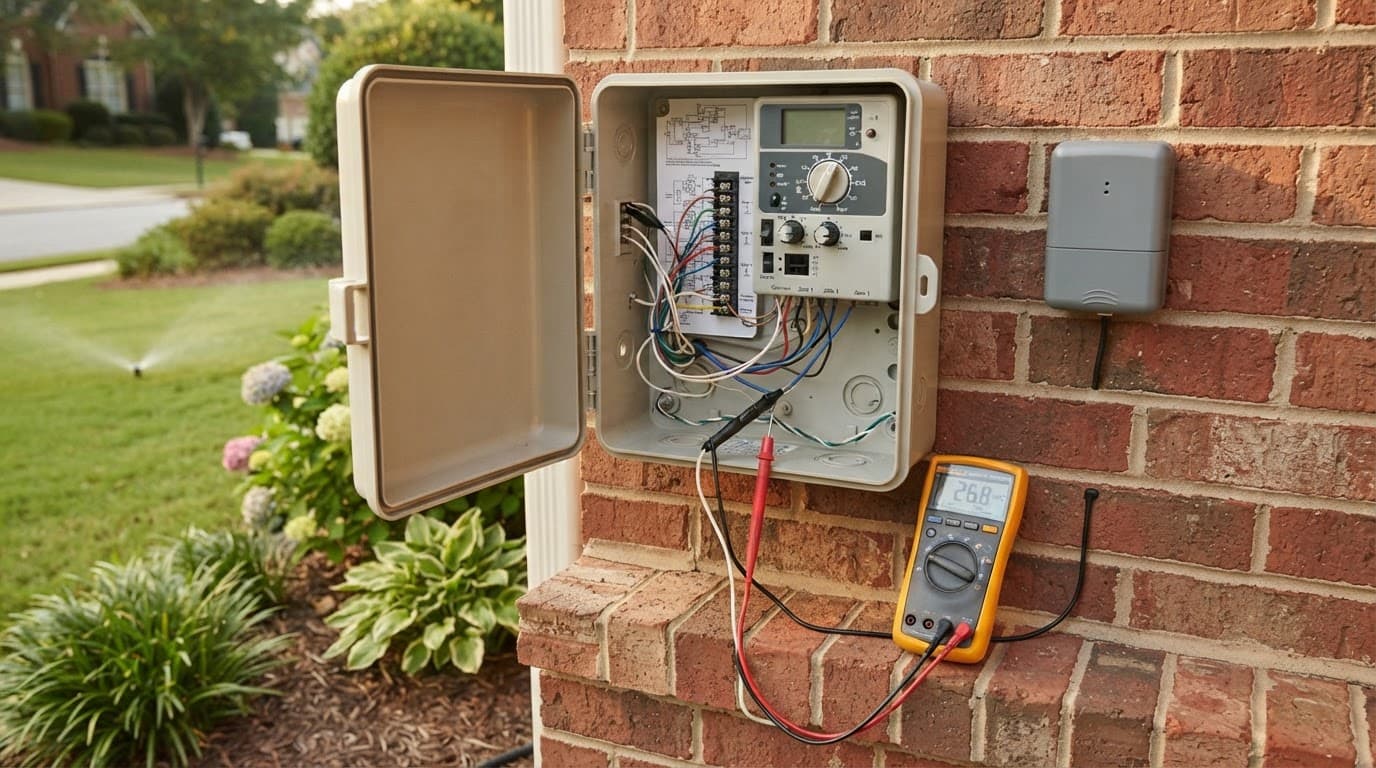
Test the station wire at the controller
Turn off the controller power before handling bare conductors. Take a photo of the existing terminals so you can return each wire to its original position.
Look for a loose station wire, corrosion, a wire pulled out of its terminal, or damaged insulation. The common wire usually connects to a terminal marked C or COM. The station wire connects to the numbered terminal for that zone.
With the affected station running, a multimeter set for AC voltage can test between the common terminal and the zone terminal. Many residential irrigation controllers send about 24 VAC to an active station, but check the manufacturer's instructions for your model.
No voltage at the controller can point to a controller output, fuse, sensor circuit, or connection problem. Voltage at the controller but not at the valve suggests a damaged field wire or a bad splice.
Inspect the valve box and solenoid
Locate the valve box for the dead zone. It may be under grass, mulch, pine straw, or soil. Look for flooded boxes, chewed wires, loose waterproof connectors, cracked fittings, and signs of recent digging.
A solenoid has two wires. One connects to the zone wire, and the other connects to the common wire. With power off, test resistance across the solenoid leads. An open reading or a reading near zero can indicate a failed coil. Use the manufacturer's specifications when judging the result because resistance varies by solenoid model.
If the solenoid tests normally, the valve may still have a mechanical problem. Debris can block the diaphragm, and a damaged diaphragm can prevent the valve from opening or closing.
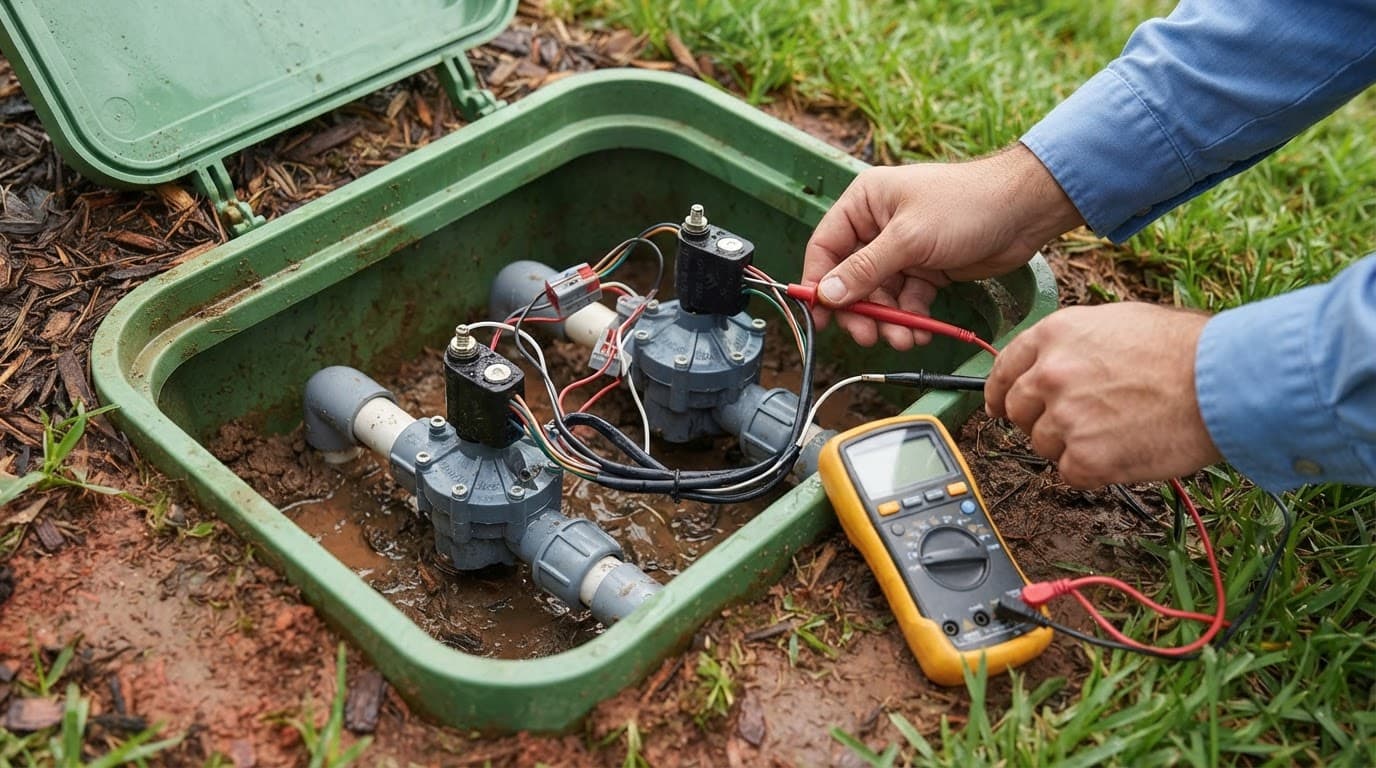
Avoid repeatedly activating a valve with exposed wiring. Keep connections dry and use irrigation-rated waterproof wire connectors when making repairs.
Check Sprinkler Heads and Water Flow
Electrical testing can show that the controller and valve are working, yet the lawn may still receive little or no water. At that point, check the water path and sprinkler hardware.
Compare the zone with a working zone
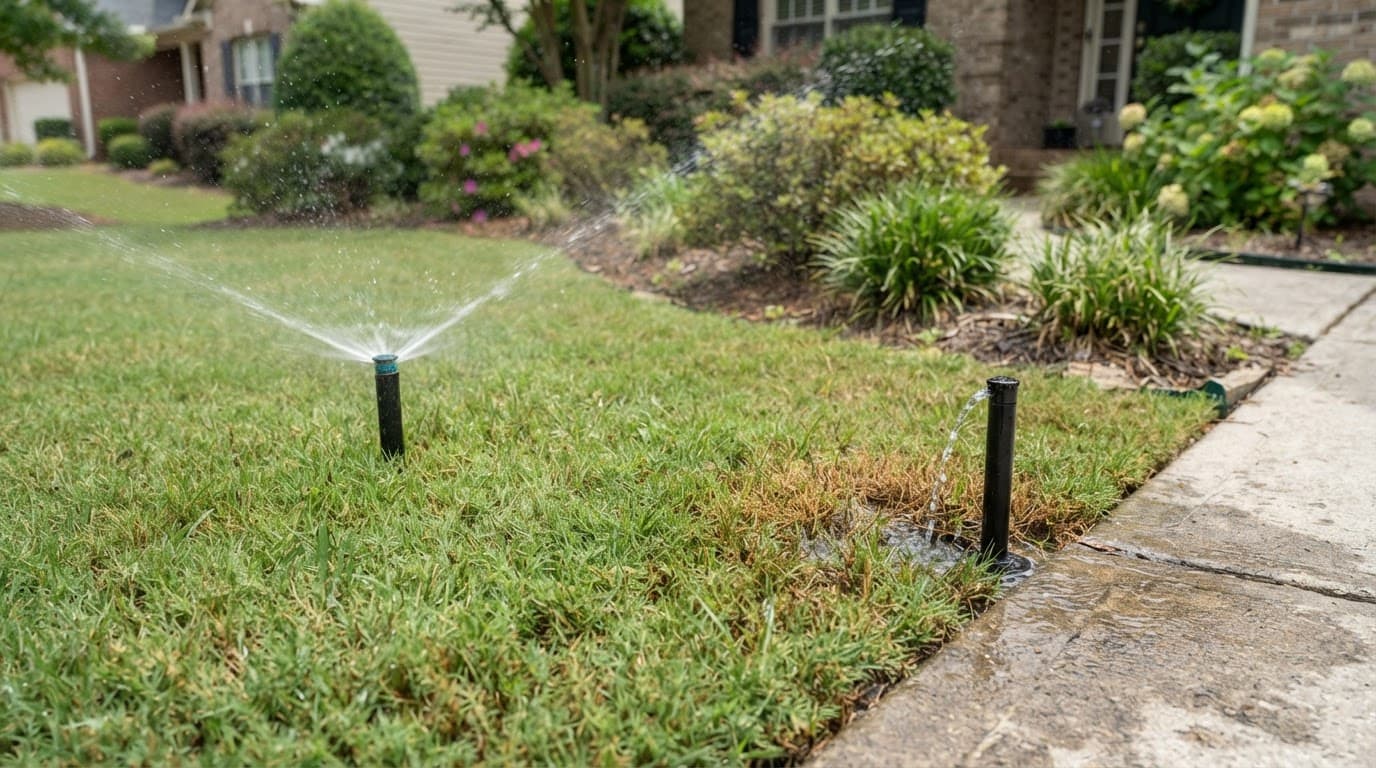
If nearby zones have normal pressure, compare their spray patterns with the affected zone. A dead zone with no water at any head usually has a valve, supply, or control problem. One dry area within an otherwise active zone usually has a clogged nozzle, broken head, blocked filter, or damaged lateral line.
Check the irrigation shutoff and backflow preventer if the entire system has weak flow. Some systems also have a pressure regulator or pump that can cause trouble when it fails.
A broken head may spray sideways, bubble at the soil line, or leak after the zone shuts off. Remove dirt and grass around the head, clean the nozzle, and check whether the riser moves freely. Don't increase pressure to compensate for a damaged head.
Watch for leaks and drainage problems
A valve that stays partly open can create a soggy patch near the valve box while the rest of the zone remains dry. Broken underground pipe can produce the same pattern, especially after grading, fence work, tree planting, or hardscaping.
Many Metro Atlanta properties have dense clay soil or sloped yards. Water may run off before it reaches the roots, even when the controller completes the cycle. If your lawn stays wet in one area, review these Atlanta drainage solutions for soggy lawns before adding more irrigation time.
Check Atlanta Weather, Sensors, and Seasonal Settings
Atlanta's weather can make a working irrigation system look unreliable. Heavy storms may trigger a rain sensor, while a long hot spell can expose weak coverage or a short watering schedule.
Inspect rain delays and weather controls
Rain sensors often sit on a roof edge, fence, or gutter where they can collect water. Confirm that the sensor has not been knocked loose, painted, covered by debris, or damaged by a branch.
Smart controllers may also pause watering because of weather data, soil moisture settings, or seasonal programs. Review the controller's activity history if it has one. Look for skipped runs, rain holds, station errors, or a schedule that changed after a power outage.
Match watering to grass and soil
A schedule that works for Bermuda in July may be wrong for tall fescue in August. Established lawns often need about 1 inch of water per week during active growth, including rainfall, but the correct runtime depends on sprinkler output and soil conditions.
Use this Atlanta lawn watering schedule to adjust timing by grass type and season. Apply water in cycles on slopes or compacted clay so it can soak in instead of running onto sidewalks.
Dry spots can also come from shade, tree roots, poor head spacing, or a grade that redirects water. Those conditions require coverage or soil corrections rather than longer controller run times.
Know When to Reset, Replace, or Call for Help
A reset can clear a temporary controller error, but it may erase the schedule. Photograph or write down every program before resetting the unit. Follow the manufacturer's reset procedure instead of disconnecting random wires.
Replacement becomes more reasonable when the display fails repeatedly, station outputs remain dead despite proper power, terminals are badly corroded, or the controller resets whenever one zone activates. Choose a controller with enough stations for future planting beds and repair work, not only the zones you use today.
Call an irrigation professional when you find a buried wire break, several failed zones, a damaged backflow device, repeated solenoid failures, or a valve box that sits under a driveway or retaining wall. Stop testing if you smell burning, see melted insulation, or find unsafe high-voltage wiring.
Before scheduling service, record the controller brand and model, affected station number, symptoms during manual operation, and any recent yard work. Photos of the controller terminals and valve box can also help the technician bring the right parts.
Prevent the Same Zone From Failing Again
After a repair, run every station and walk the full zone. Confirm that heads pop up, spray the intended areas, retract after shutoff, and don't water sidewalks, siding, or neighboring property.
Keep valve boxes accessible and trim grass around sprinkler heads. Mark irrigation lines before planting, grading, installing landscape rock, or building retaining walls. A shallow wire or pipe can be damaged by work that seems unrelated to irrigation.
Use waterproof connectors on all underground splices. Replace cracked heads and clogged nozzles instead of extending run times to cover the problem. In spring, test the system before summer heat arrives. In fall, inspect exposed backflow equipment and pipes before freezing weather.
If your system has already suffered freeze damage or includes exposed components, follow this Atlanta sprinkler winterization checklist before the first hard freeze. Proper winter preparation protects valves, pipes, and backflow equipment.
Conclusion
A zone that won't run needs a methodical check, not a new controller right away. Start with programming and power, use manual operation, test the station wire, inspect the valve and solenoid, then check water flow and sprinkler heads.
For Atlanta lawns, weather sensors, clay soil, slopes, and seasonal grass needs can add another layer to the diagnosis. Once you identify whether the failure is electrical, mechanical, or coverage-related, you can make the right repair and keep the lawn watered without wasting water.